GUI Widgets
A graphical user interface (GUI), also called a user interface (UI), allows users to interact with your widget’s code using visual elements like buttons, textboxes and links. In py.space, you can design your UI by dragging and dropping components onto the page. Each component is a Python object, which you can use from client code.
To create a GUI widget in py.space, choose “GUI” under “What do you want to build?” on the home screen.

Creating a GUI widget from the home screen
Your new GUI widget will already have some components added to the page and code written. You can delete or edit these as you need, but if you’re new to building GUIs in py.space, we recommend you explore the widget and its code first.
The GUI editor
Embedded below is a simple GUI widget. Switch between the different tabs as you follow along with this reference guide.
Design
In Design view, you can build the user interface of your widget. From the Toolbox on the right of Design view, you can drag and drop components onto the page to build your UI.
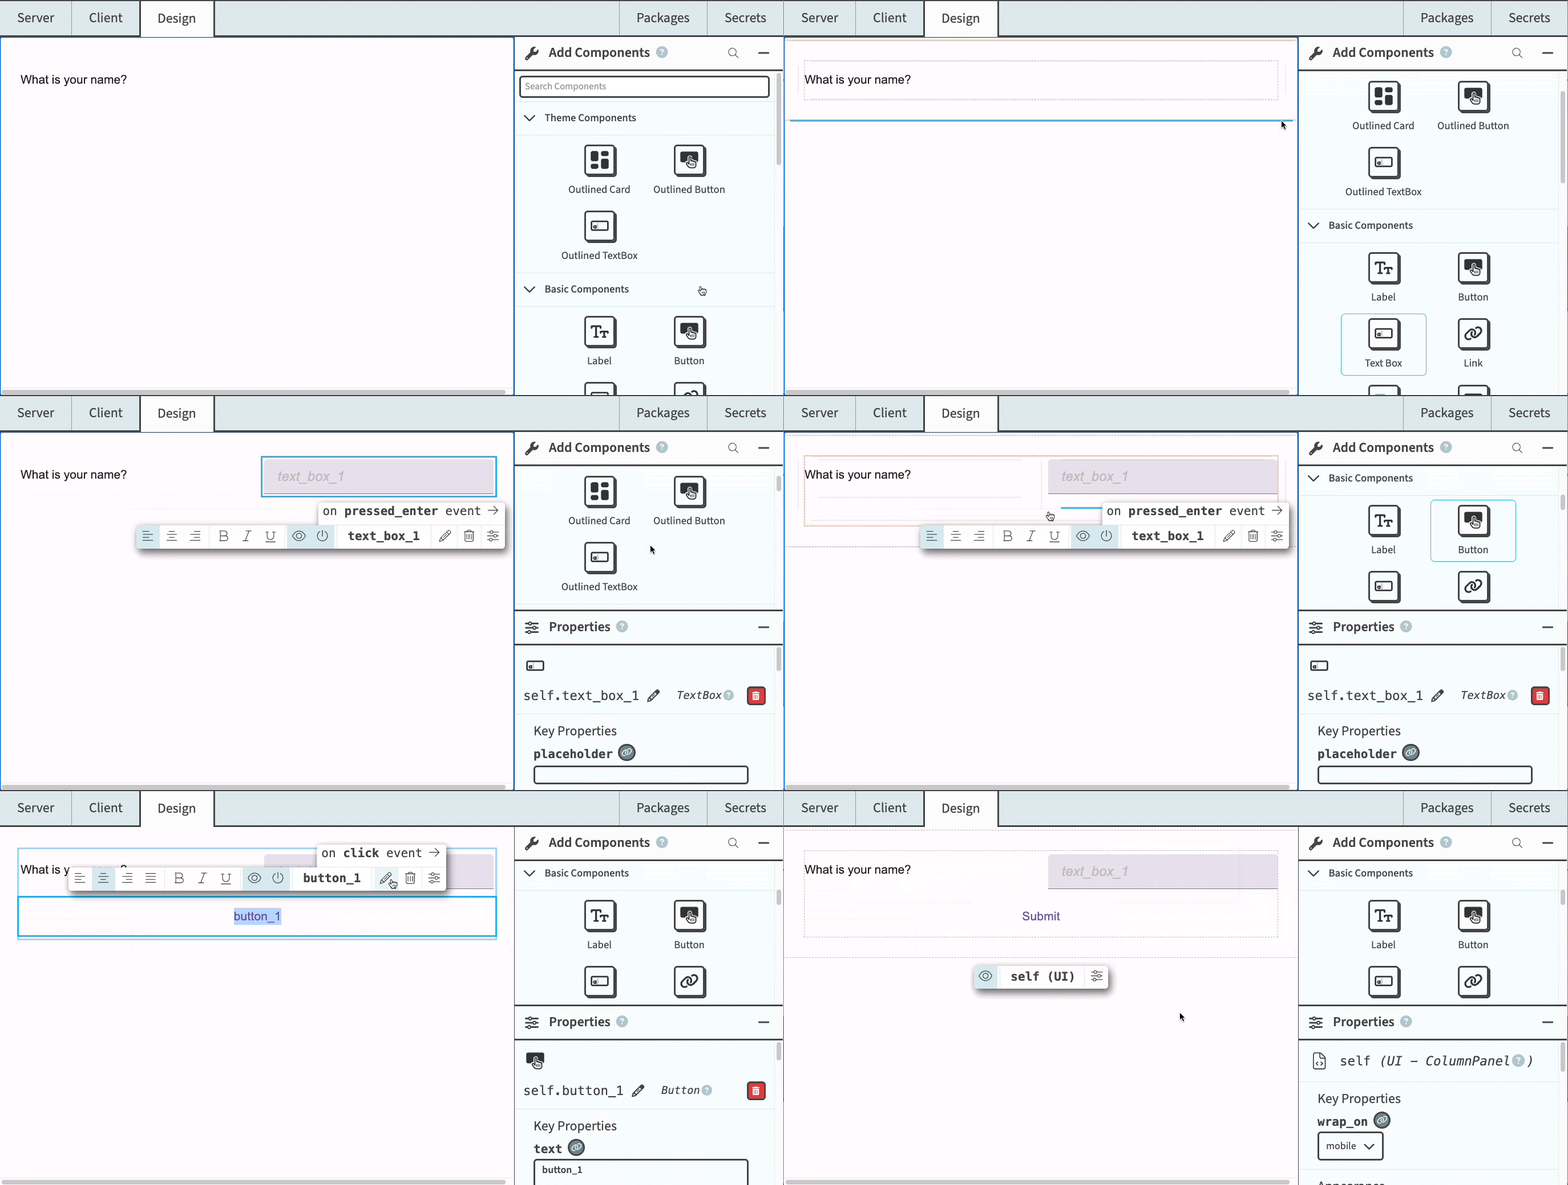
Dragging and dropping components to build a UI
Client
The Client view shows you the Python code that represents your UI. Every component you add to your UI is a Python class. Even the UI itself is a Python class!
When someone visits your widget, py.space compiles its client-side Python code into JavaScript. This code runs in the user’s web browser, which means that any user who visits your widget has access to its client-side code. If you want to run secure code, you’ll need to write it on the server.
Server
Server view shows you the server-side code for your widget.
Server code in py.space is a full server-side Python environment where you can import any packages you like. Server code is secure and cannot be altered by the user, so you can trust your code to run exactly as intended. Functions writen in server code can be called from your client code. See ‘Communicating between the client and server’ for more details.
Components
Your py.space user interface is made up of components. The easiest way to add components to your UI is to drag and drop them from the Toolbox in Design view.

Dragging and dropping components to build a UI
You can also add components in code:
my_text_box = TextBox() Some components display information to the user, such as Labels and Images. Others take user input, such as TextBoxes and Buttons.
You control the content, appearance and behaviour of your components by setting their Properties. You can set these properties while you’re building your app using the Properties Panel or the Object Palette. You can also set them while the app is running using client code.
You can make components interactive using Events. These are Python functions that run when something happens - when the user clicks on the component, or enters text, or when the component appears on the screen for the first time.
Many components can contain other components - these are called Containers. Containers are useful for creating the layout of your UI.
Everything is a Python object
Every component that you add to your UI is represented in code as a Python class. Even the UI itself is a Python class.
Each component that you’ve added to the page has a name (e.g. text_area_1) so that you can refer to it from code. You can change a component’s name by clicking on the component then clicking on its name in the floating Object Palette.

Changing the name of a TextArea component
You can access components as attributes of the UI object. For example, if you add a Button to the page with the name button_1, you can refer to it in client code as self.button_1
class UI(UITemplate):
  def __init__(self, **properties):
    self.init_components(**properties)

    self.button_1.text = 'Click me!'
Since components are just Python classes, you can also create instances of components entirely in code.
class UI(UITemplate):
  def __init__(self, **properties):
    self.init_components(**properties)

    my_button = Button(text='Click me!')
The button now exists in Python code, but it won’t show up on the page until we add it to a Container. We’ll see how to do that in the Containers section below.
Properties
Properties control the content, appearance and behaviour of components. When you click on a component, the Properties Panel will appear below the Toolbox. Here you’ll see a number of properties that you can set for your component, such as text, background and font_size. Different components have different properties available
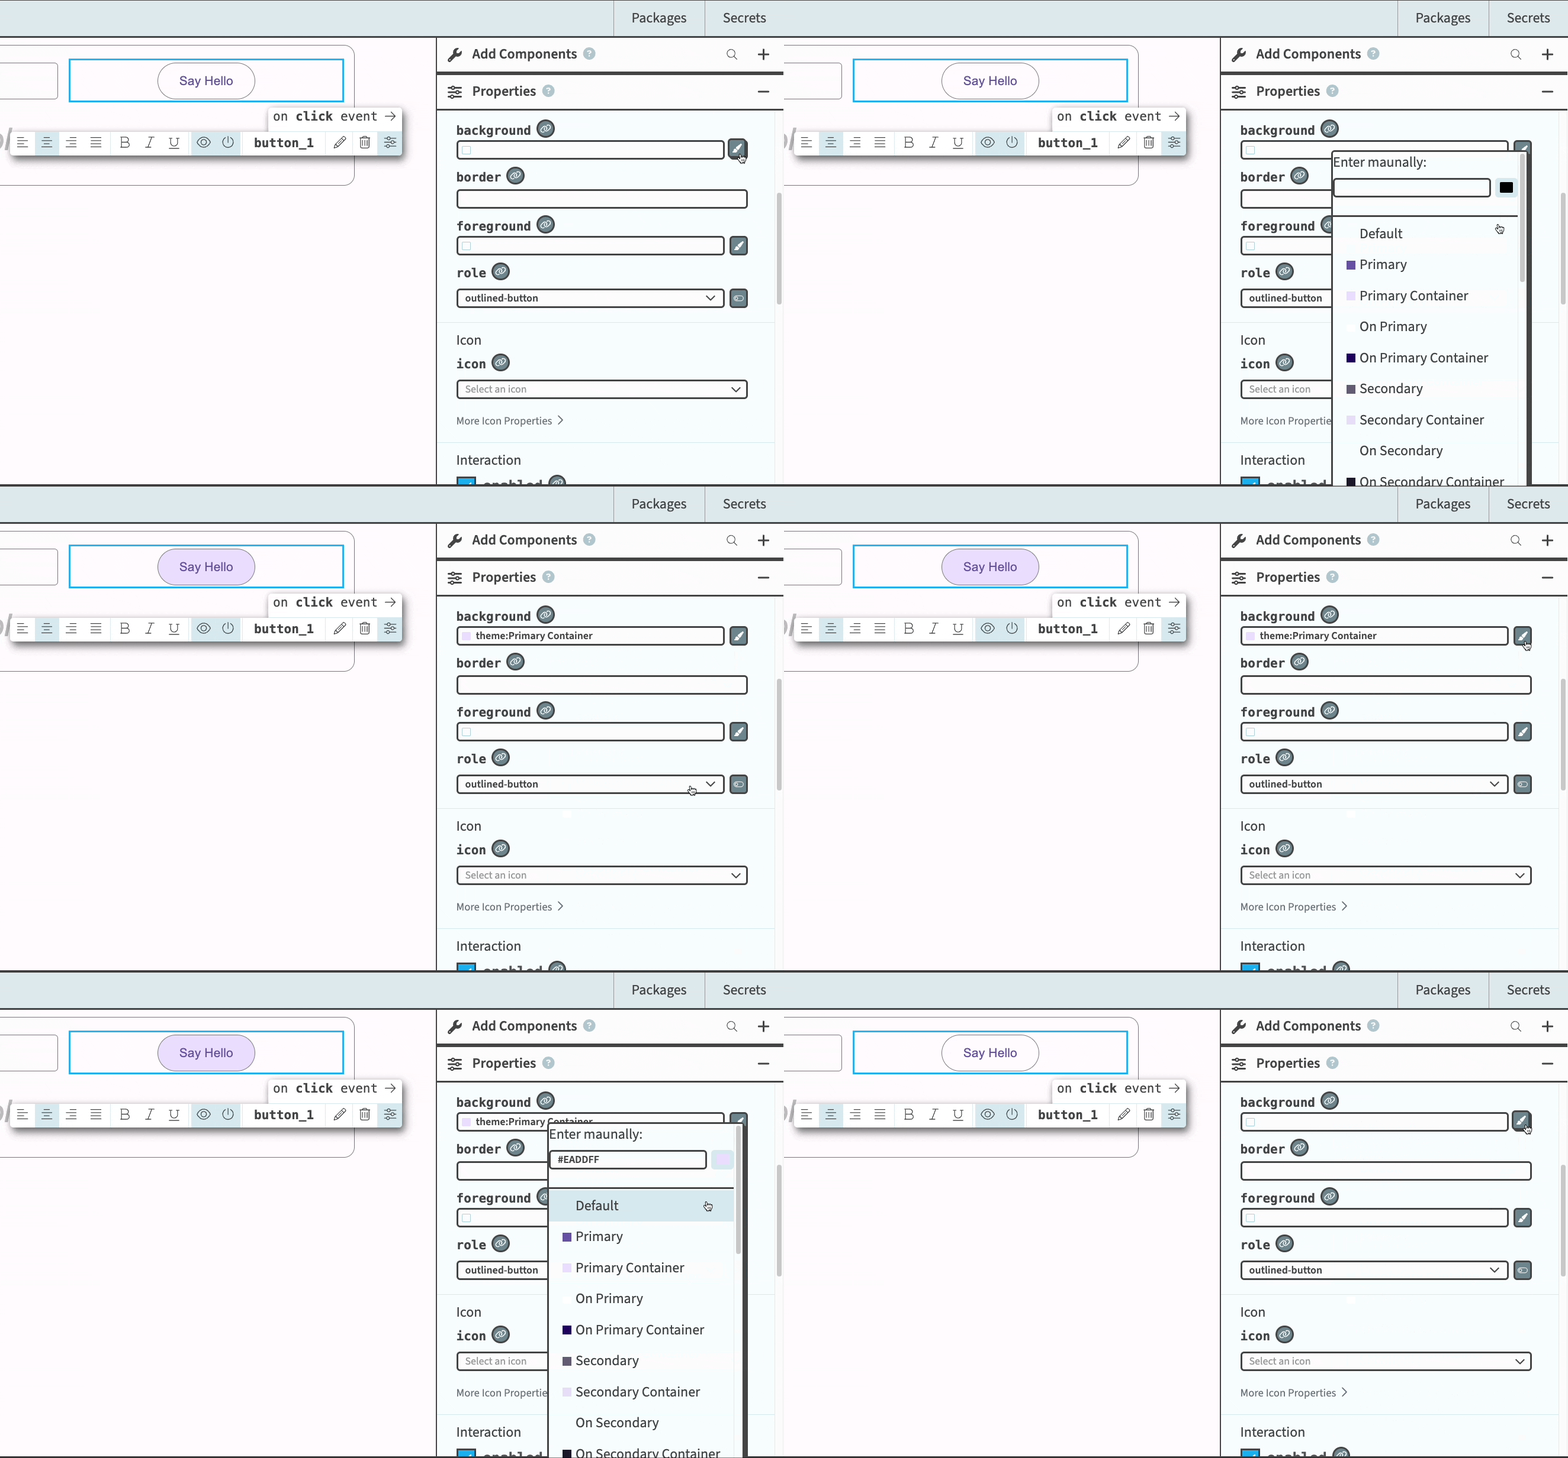
Setting the background color of a Button from the Properties Panel
When you click on a component, you’ll see the floating Object Palette. From here, you can set some of the most common properites for that component.
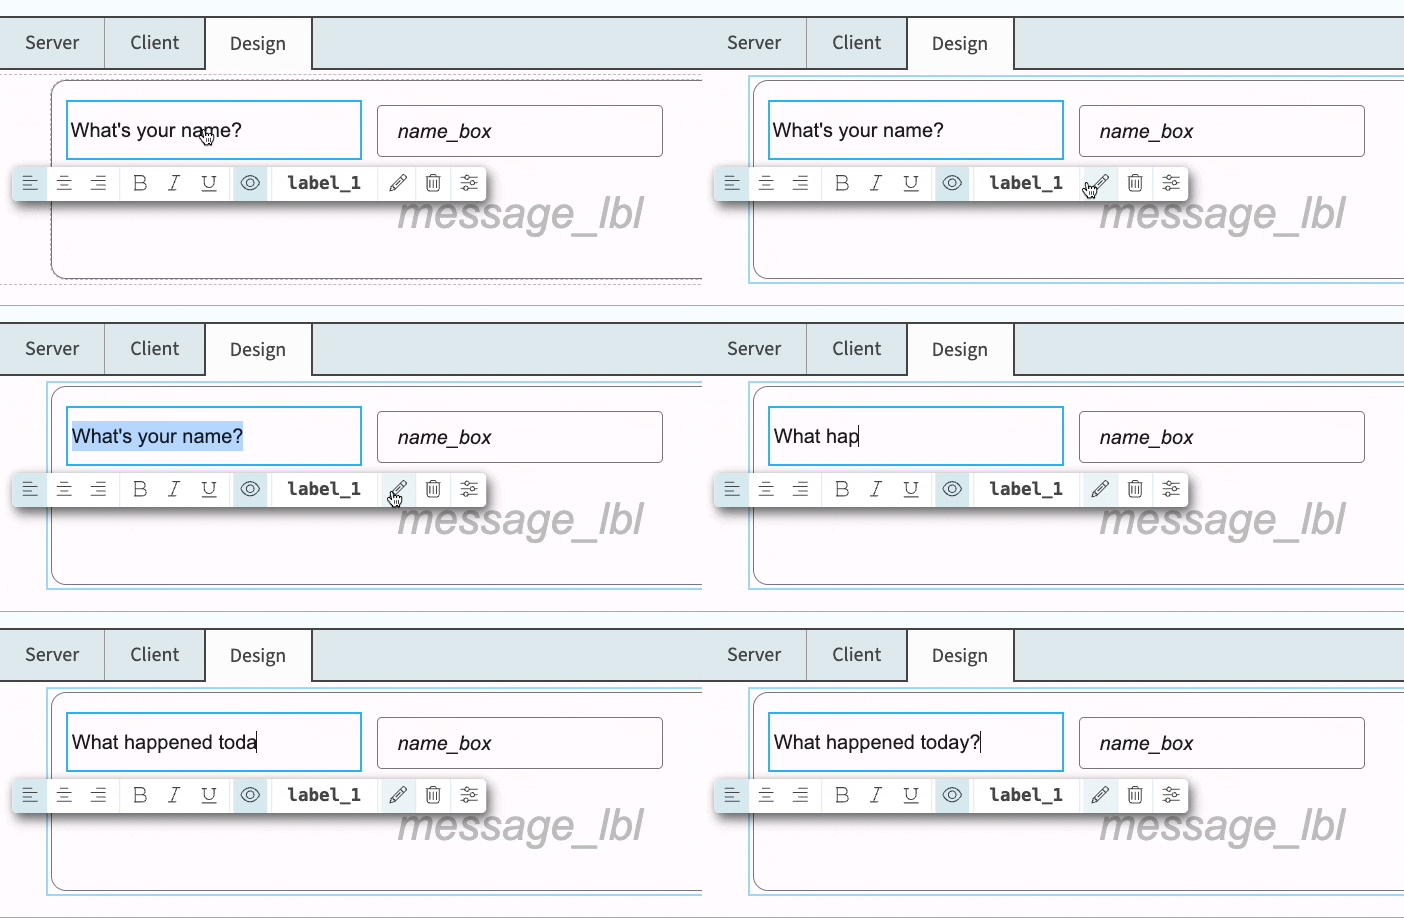
Setting the text of a Label using the Object Palette
You can also set properties from client code. When you set properties from code, they will be set at runtime, so you won’t see the changes reflected in Design view.
self.label_1.text = "What happened today?"Events
Components can also raise events. Events occur when users interact with your widget. For example, when a Button is clicked, a click event is raised by that component. In py.space, you can write Python code that runs whenever a specific event is raised.
To set up an event handler for a component, click on the component and scroll to the bottom of the Properties Panel. Expand the “Events” section to see all the events that the component raises. For example, a Button has show, hide and click events.
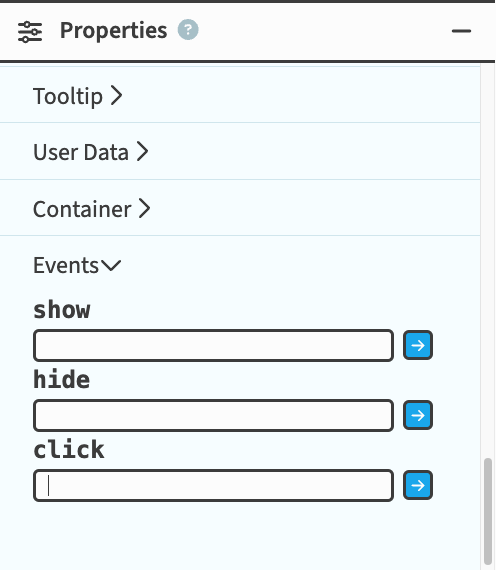
The Properties Panel showing the events that a Button raises
If you click on the blue arrow next to an event, the Client view will open and a Python function will automatically be created. This function will run whenever that event is raised.
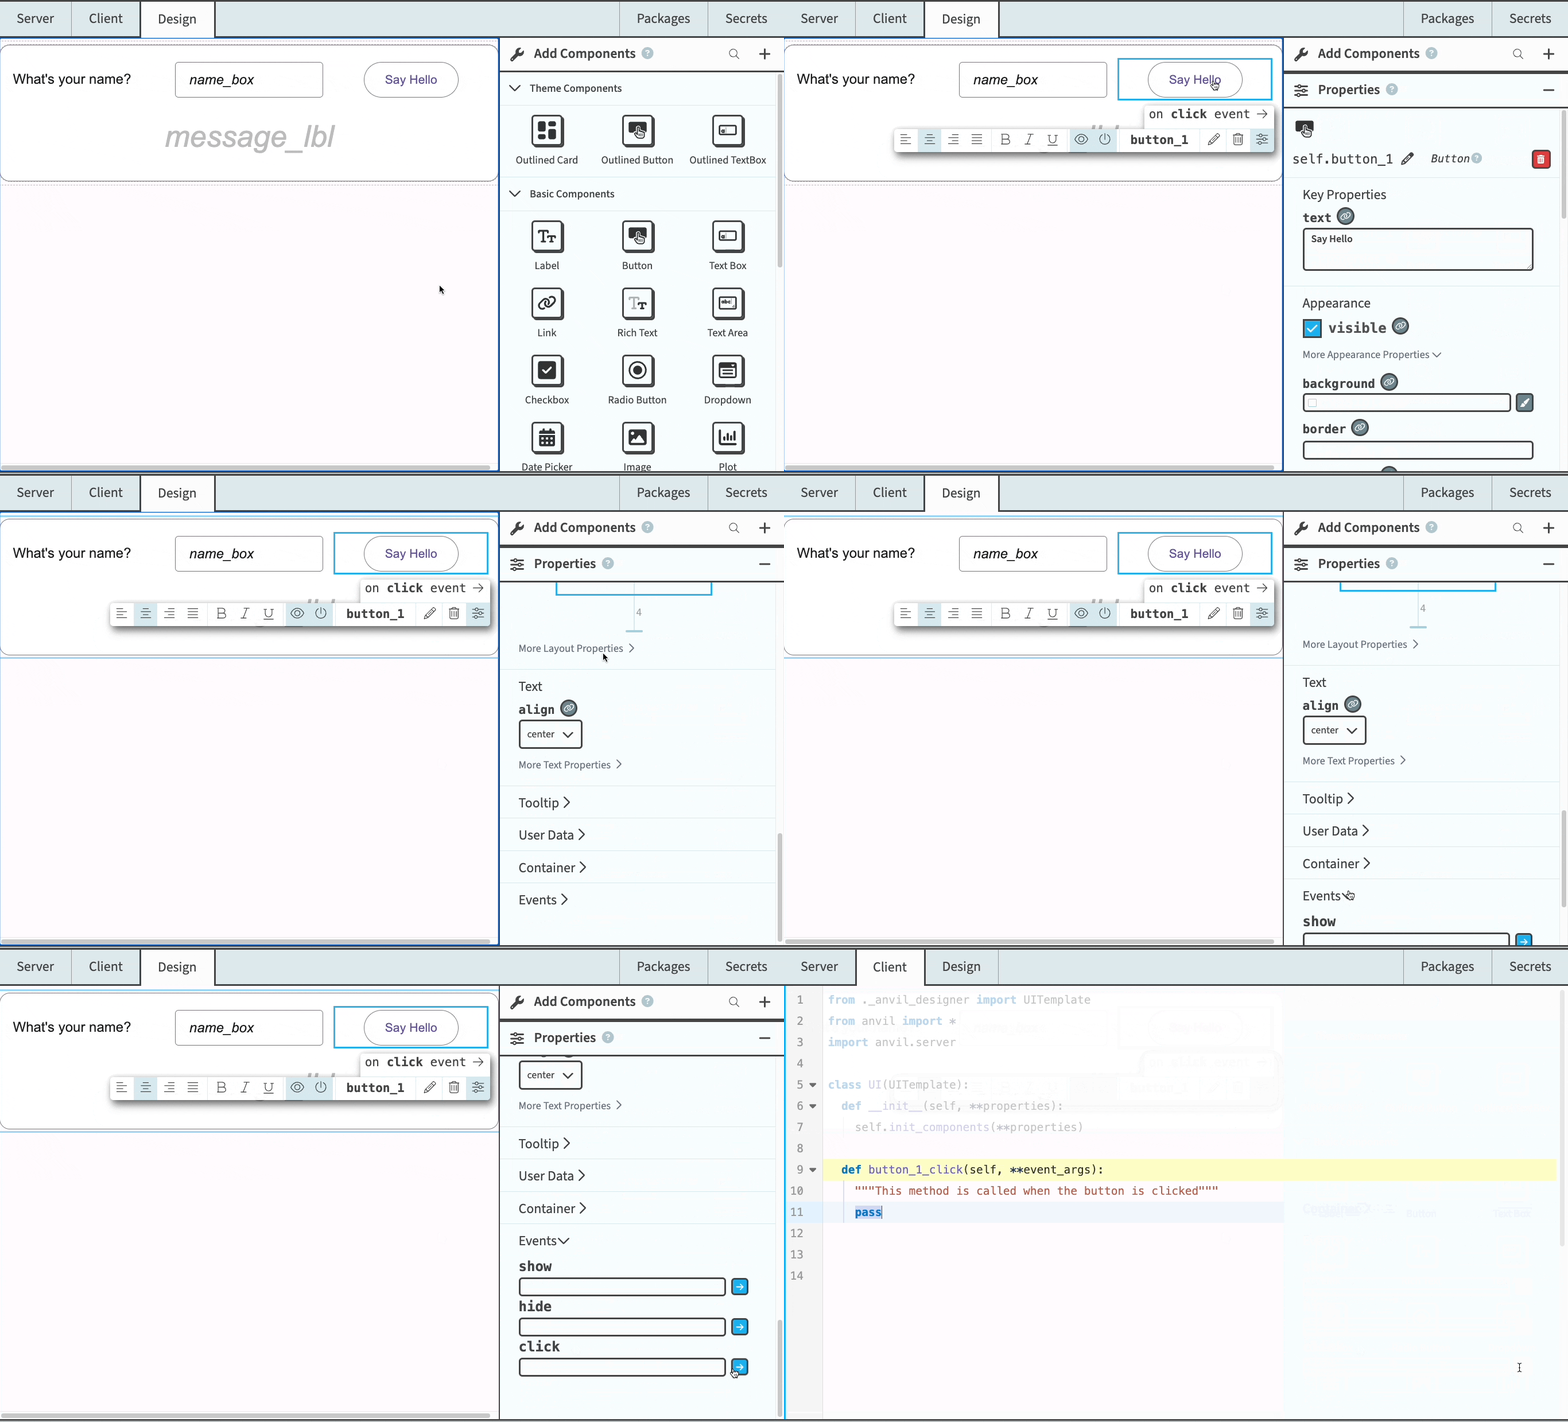
Creating a click event handler for a button
You can also set the most common event for each component from the Object Palette:
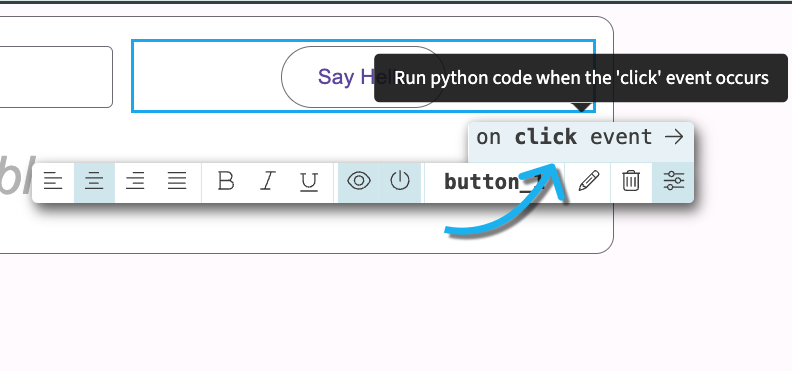
Setting a click event handler for a Button
Containers
Some components, such as ColumnPanels and RepeatingPanels, can contain other components. These components are called Containers. Container components help you lay out your page and group components together. The easiest way to use a Container is to drag and drop one onto your UI then drag and drop other components inside.
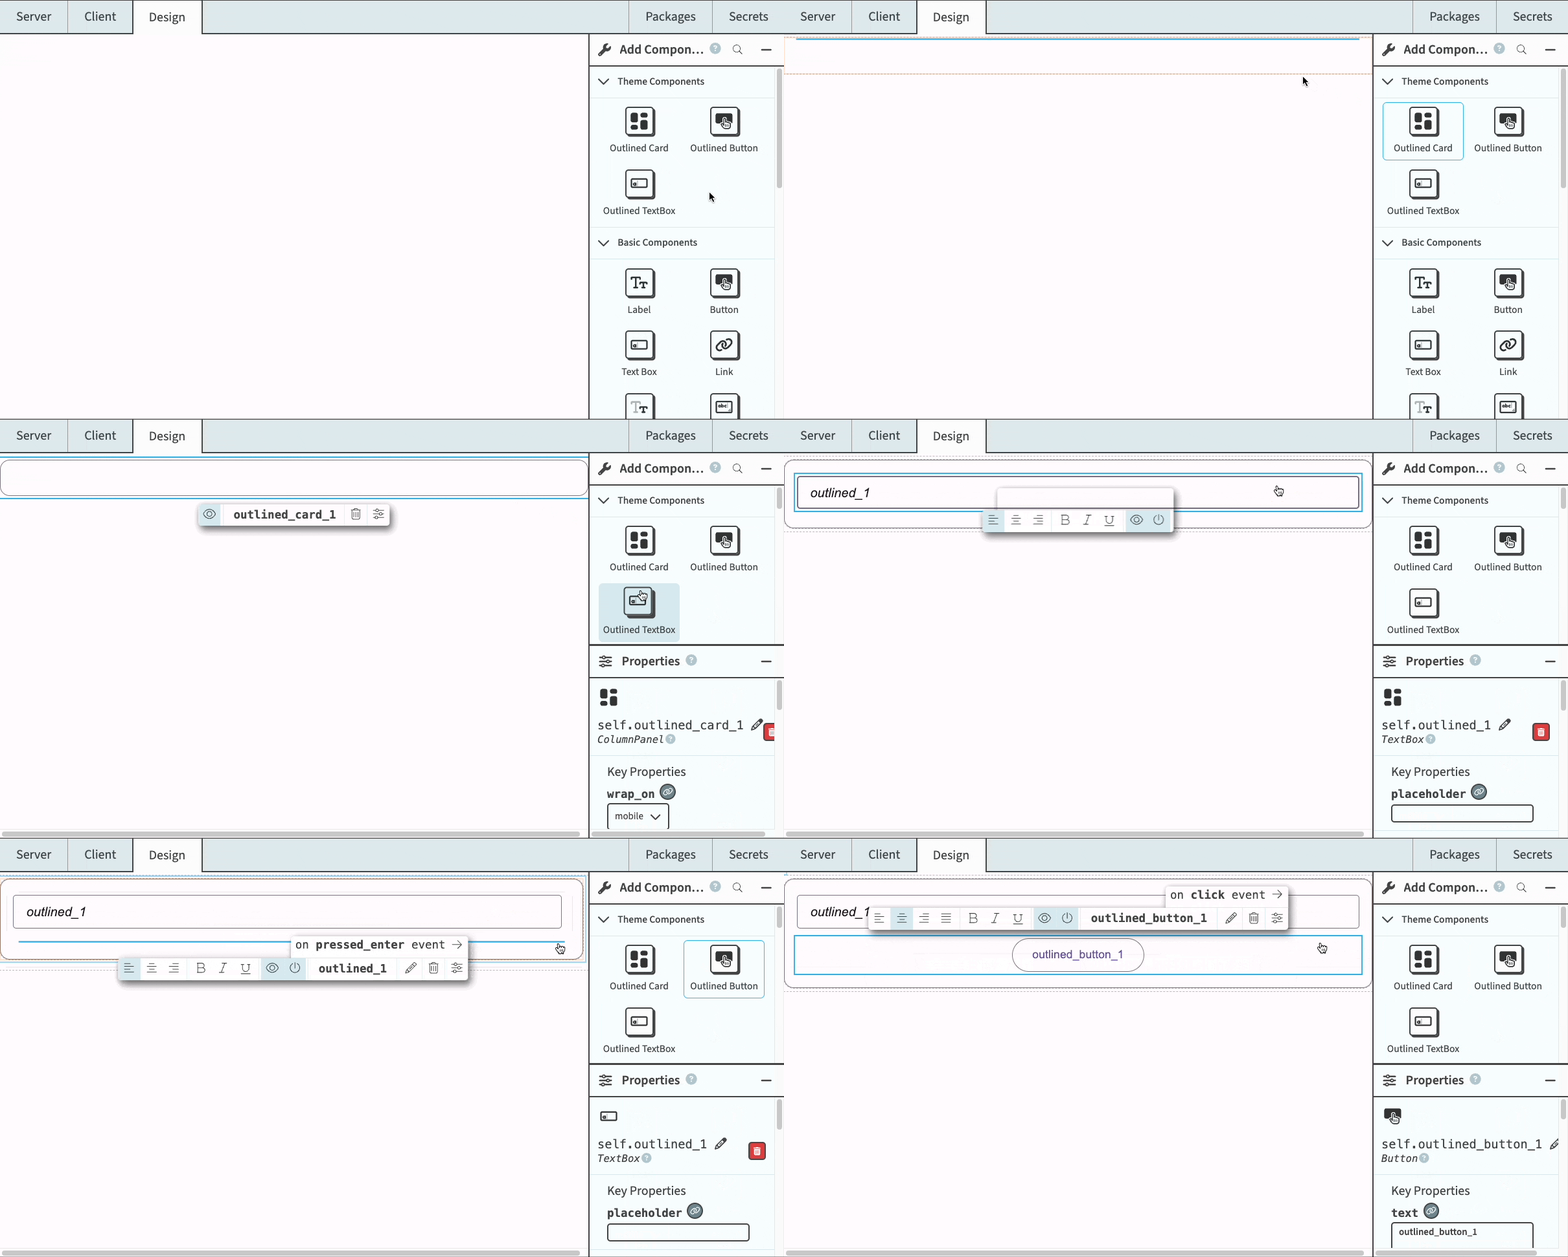
Adding components to a Card, which is a Container component
For a full list of Container components, see the Anvil docs.
You can add a component to a Container in Python by calling the Container’s add_component() method. If you create a component in code, it won’t be displayed on your UI until you add it to a Container.
btn = Button()

self.column_panel_1.add_component(btn)
The get_components() method returns a list of all the components that have been added to a container.
for c in self.column_panel_1.get_components():
  print(c)
Communicating between the client and server
Secure code and code that can’t run in the browser should be run in a server environment. Here, you can write secure code including functions that can be called from client-side code. To make a server function callable by the client, you need to decorate it with @anvil.server.callable.
For example, the following server code uses the yfinance and Plotly graph_objects libraries, which can’t run on the client. The server function is decorated with @anvil.server.callable which means it can be called from the client. The function returns a scatter plot, which is displayed on a Plot from client code.
import anvil.server
import yfinance as yf
import plotly.graph_objects as go

@anvil.server.callable
def get_price(symbol):
  hist = yf.Ticker(symbol).history(period="1mo")
return go.Scatter(x=hist.index, y=hist['Close'].to_list())self.plot_1.data = anvil.server.call('get_price', 'AAPL')Do you still have questions?
Our Community Forum is full of helpful information and friendly experts.

